|
I found some Red Heart Scrubby yarn on clearance at Michaels, and figured I'd give it a try. I'm new to crocheting (new as in...I learned on January 3, and today is only January 20!) and haven't used a textured yarn like this, but I thought, why not :)
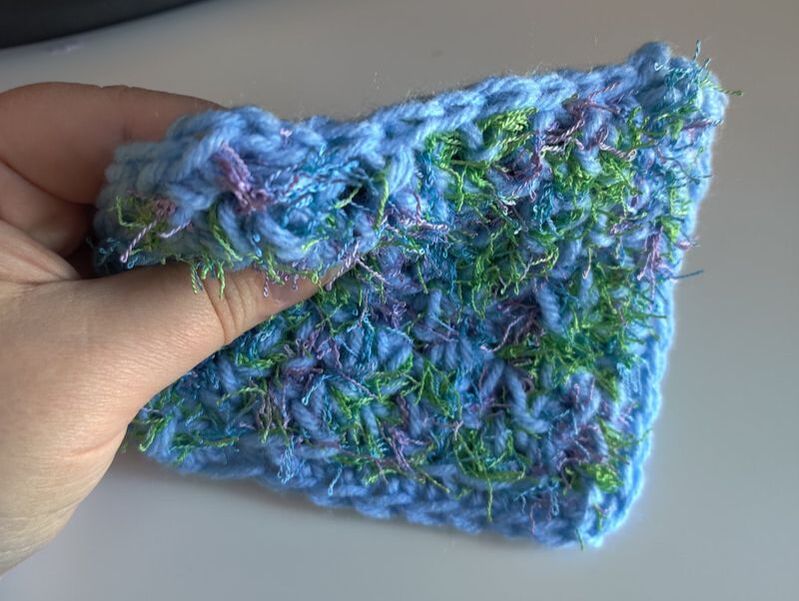
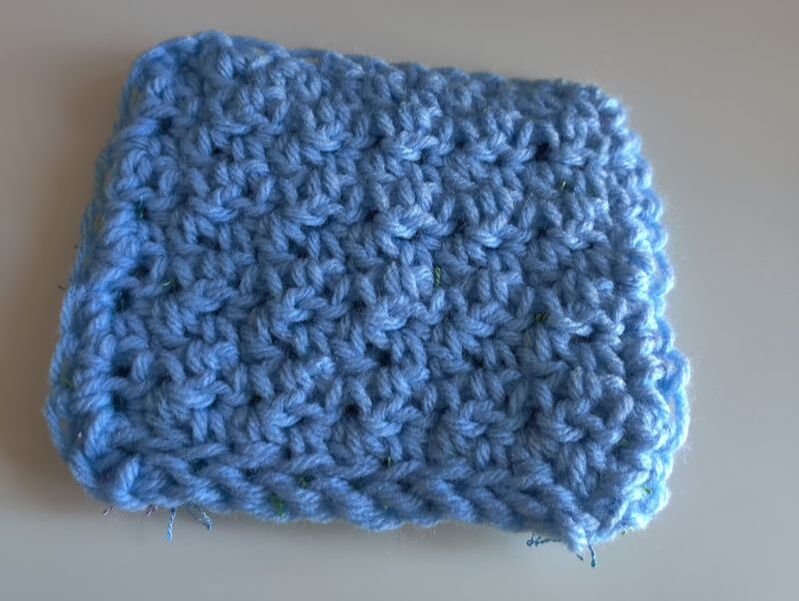
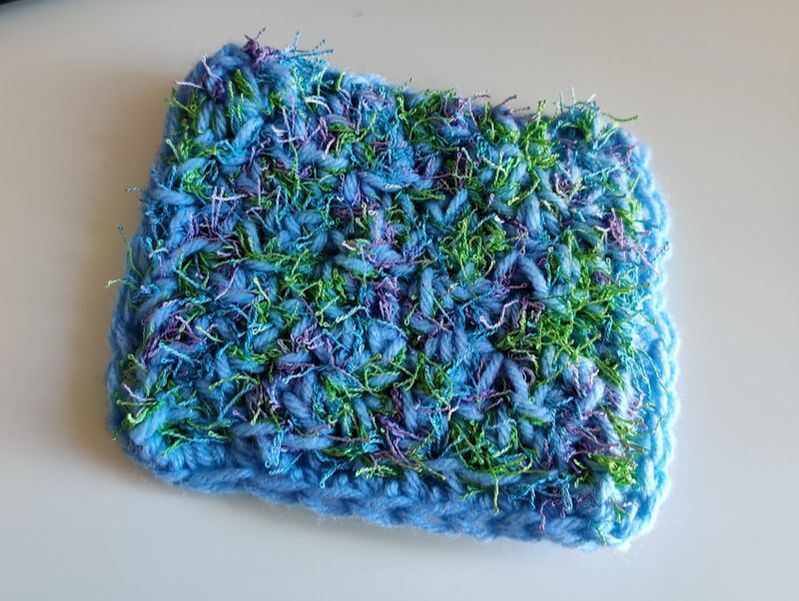
I didn't see any patterns I liked, so I made my own. I wanted it to be double-sided (one scrubby side and one softer side) and square-ish instead of round. I saw patterns where you could crochet two separate squares and stitch them together, but that seemed meh. Anyway, here is my pattern(!):
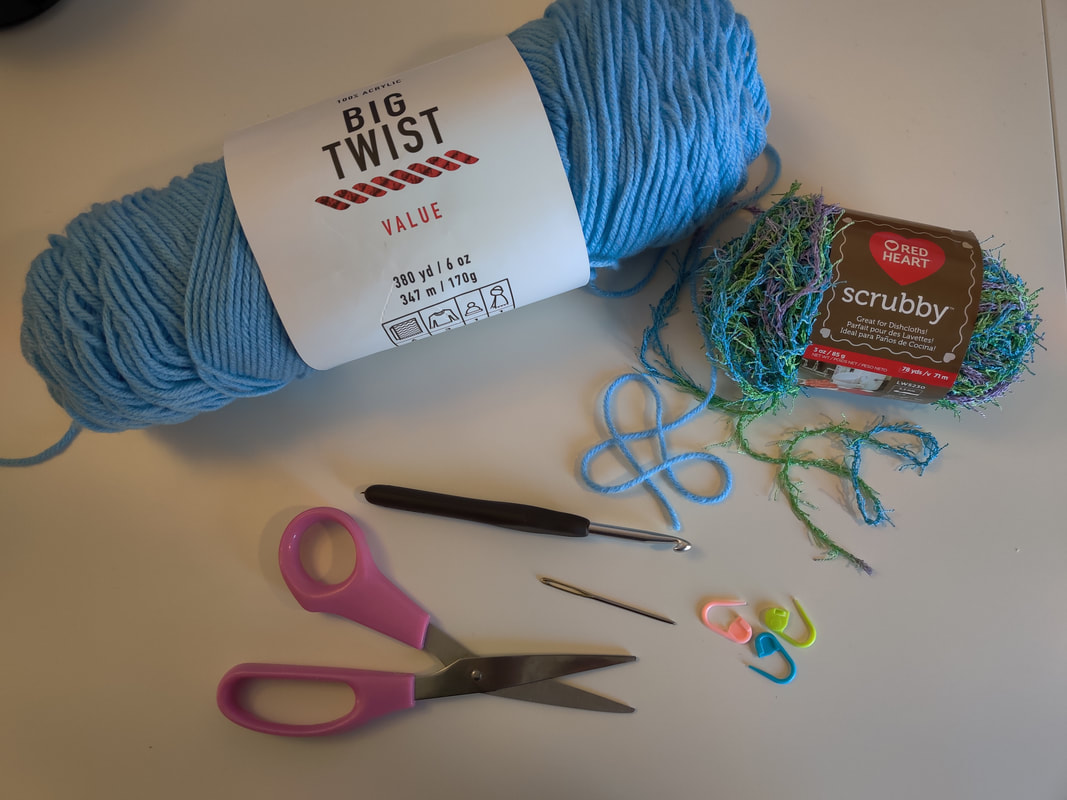
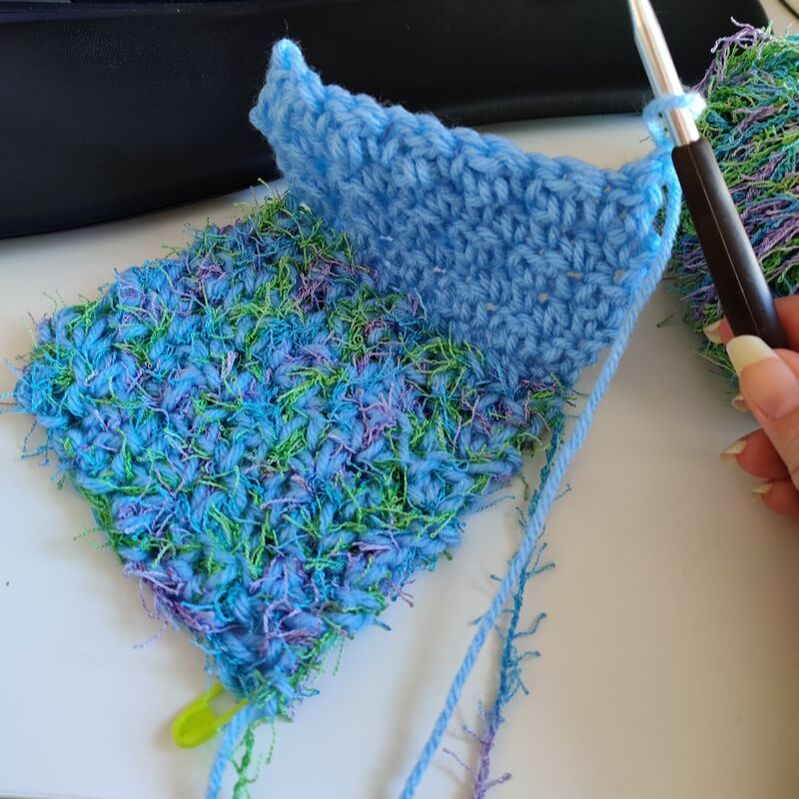
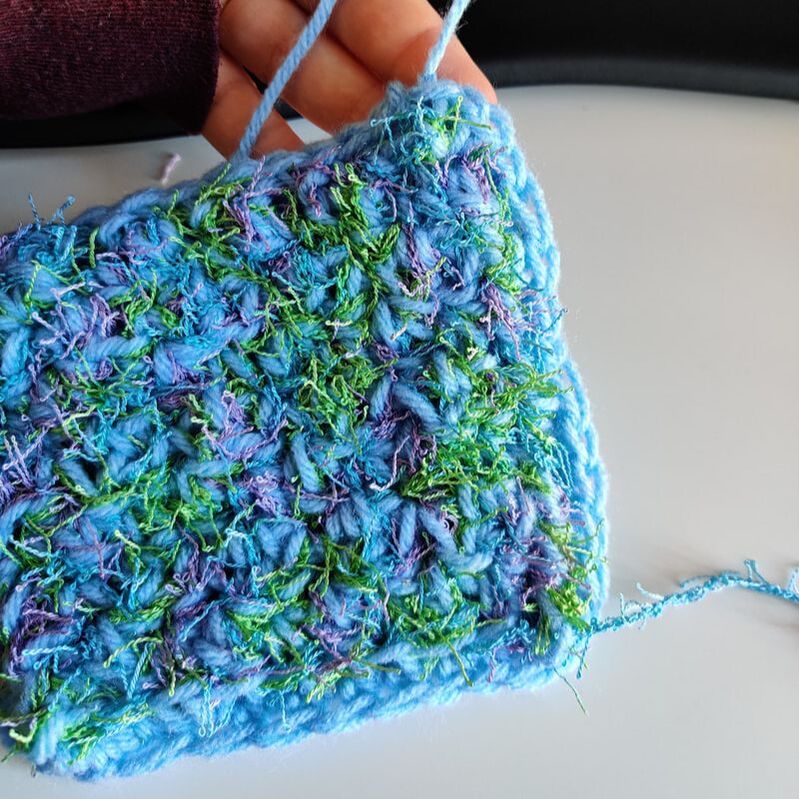
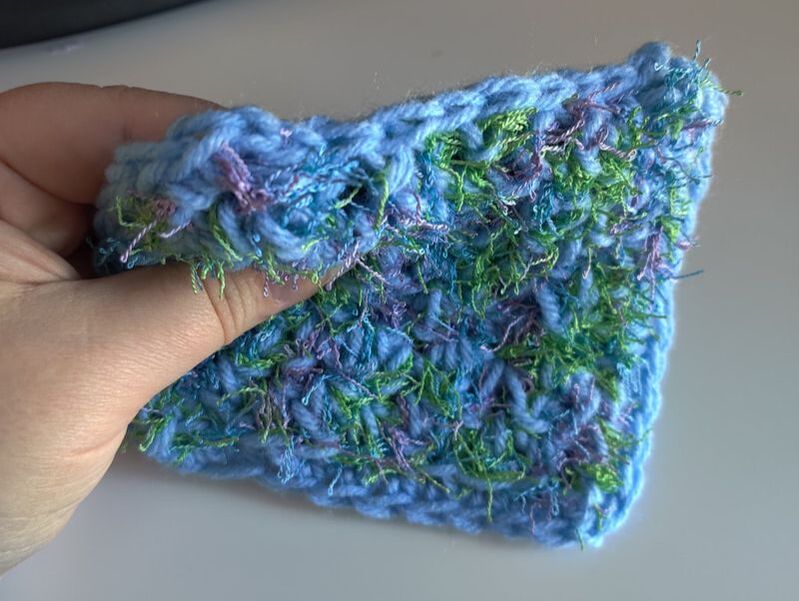
(Click here to open/save the pattern in Ravelry.) Supplies: - scrubby yarn - I used the "Capri" colorway in Red Heart Scrubby Yarn. This is a #4/medium/worsted weight yarn, although the strands are very thin compared to 'regular' yarn. - non-scrubby yarn - which I will call "soft yarn" for convenience. I used the only yarn I had on hand that coordinated well with my scrubby yarn and was the same weight - Big Twist Value Yarn in Cornflower Blue. This is also a #4/medium/worsted weight yarn. - crochet hook - matching the largest gauge your yarn calls for. In this example, my scrubby yarn called for I/9/5.5mm hook, while my soft yarn called for an H/8/5.0mm hook. I used the larger size, I/9/5.5mm with nice easy tension and it worked well for me. - scissors - of course, for cutting the yarn. - tapestry needle - for weaving in ends. If you don't have one, you can use a hook to weave ends, or just tuck them between the layers of the scrubber. - stitch markers - optional, but helpful with the textured scrubby yarn. I used one to mark the slip stitch in the foundation chain; putting some at the end of the first row, and the beginning and end of the last double-yarn row [i.e., in each corner of the work] may also be helpful. Note: People usually suggest using 100% cotton yarn for projects that will get wet - the scrubby yarn (presumably designed for scrubbing wet things) is 100% polyester, although I see online now that cotton versions are available; and my random matching yarn is also 100% acrylic. Cotton would probably be better, but here we are...maybe next time I make a scrubby cloth ;) Abbreviations & Stitches Used: CH = chain ST(s) = stitch(es) SC = single crochet DC = double crochet SL = slip stitch FLO = front loop only Pattern: Here is a "narrative" version of the pattern that explains each step in more detail. My finished work with these yarns is about 5.5" wide by 5" tall. If you want a different size, the pattern will include notes for how to make adjustments. If you'd like, you can jump to the bare bones TL/DR version below. - Foundation: Work with both yarns until otherwise specified. This will begin the double-yarn work side of the scrubber. Keep nice loose tension for the foundation so the shape doesn't distort when you begin the next rows. Slip knot; chain (CH) 11; turn. - Rows 1: Lemon Peel stitch across: *Single Crochet (SC) in the 2nd chain (CH) from hook, Double Crochet (DC) in next*, repeat between ** to the end of the row. It should be a total of 10 stitches. Chain (CH) 1 and turn. - Rows 2-3: Repeat Row 1. After Row 3, double-check to see that the width of your work is the size that you want it. (Note that the final edging will add a little under .5" to the width.) If you'd like to change the width, pull out your work and start over with more chains in your foundation if you'd like a wider scrubber, or fewer chains in your foundation if you'd like a narrower scrubber. Just remember your adjustment when you read stitch counts in the pattern :) (Total chains in the foundation should be an odd number; this is to make the proper amount of room for the lemon peel stitch, which uses an even number of stitches, plus 1 extra for the turning chain.) - Rows 4-7: Repeat Row 1. Toward the end of Row 7, double-check to see that the height of your work is the size that you want it. (Note that the final edging will add a little under .5" to the height.) If you'd like to change the height, continue working until you like the height. Alternatively, pull out a few rows if it's too tall for your liking. At the end of Row 7 [or whatever you decide on], after the last Double Crochet (DC), drop the scrubby yarn and use only the soft yarn for the final chain (CH) and turn. (You can cut the scrubby yarn at this point, though in my photos you may see that mine was still attached to the skein...that's just because I was still playing around with the pattern.) Continue only with the soft yarn for the rest of the pattern. The next row will begin the single-yarn work side of the scrubber. - Row 8: Notes about this row: This will be the "folding" row, which will help the work fold nicely over itself. For this reason, this row will be worked in the Front Loops Only (FLO). And, since we are now working with the single soft yarn instead of both the soft and scrubby yarns, the work may become a bit narrower. To accommodate this and to keep the widths the same, we will add an increase in the first and last stitches of this row. So, all in Front Loops Only (FLO): Single Crochet (SC) into the 2nd Stitch (ST) from the hook. In the same Stitch (ST), Single Crochet (SC) again. This creates the first increase. Single Crochet (SC) in the next 8 Stitches (STs). (If you altered your width from the pattern, Single Crochet (SC) all the way across, except the final stitch.) Single Crochet (SC) into the final Stitch (ST). In the same Stitch (ST), Single Crochet (SC) again. This creates the second increase and provides symmetry. It should be a total of 12 stitches. Note: depending on your yarn combination, you may need more or fewer increases so that the single-yarn work matches the width of the double-yarn work as close as possible. You may be able to tell at this point, or you may need to work the next row before making that determination. If you do need to add more increases, space them out as evenly as possible across the row for the best presentation.
- Rows 9-17:
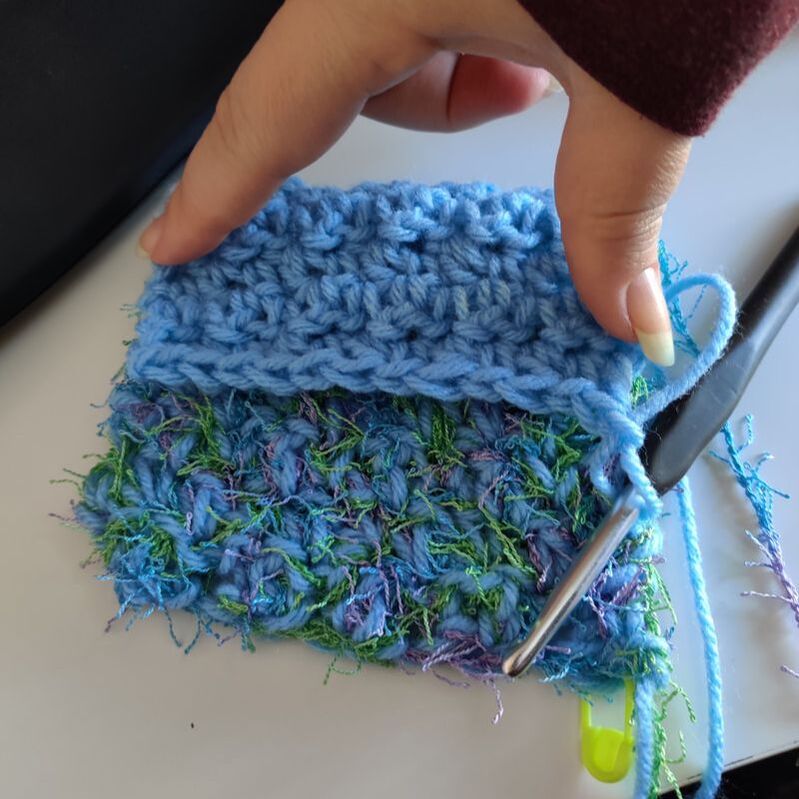
Note about these rows: The height of this single-yarn work should be the same or slightly taller than the height of the double-yarn work. But the number of rows may not be exactly the same. For example, you'll notice my pattern included 7 rows of double-yarn Lemon Peel Stitch, but is now calling for 9 rows of of single-yarn Lemon Peel Stitch. Once your work is close to the same height, fold the work in half and compare the two sections at the end of each row to determine when you should move on. Lemon Peel stitch across: *Single Crochet (SC) in the 2nd chain (CH) from hook, Double Crochet (DC) in next*, repeat between ** to the end of the row. It should be a total of 12 stitches. Chain (CH) 1 and turn. After Row 17, fold the work in half - it should naturally fold one way better than another (towards the side where you worked the Front Loop Only (FLO) row.) Compare the height of the double-yarn work to the height of the single-yarn work. If the single-yarn work is shorter than the double-yarn work, continue crocheting additional rows in the same way until the work is equal in height (or until the double-yarn work is just barely taller than the single-yarn work). If the single-yarn work is more than a full row taller than the double-yarn work, pull out some work until the height is as described in the previous sentence.
- Row 18:
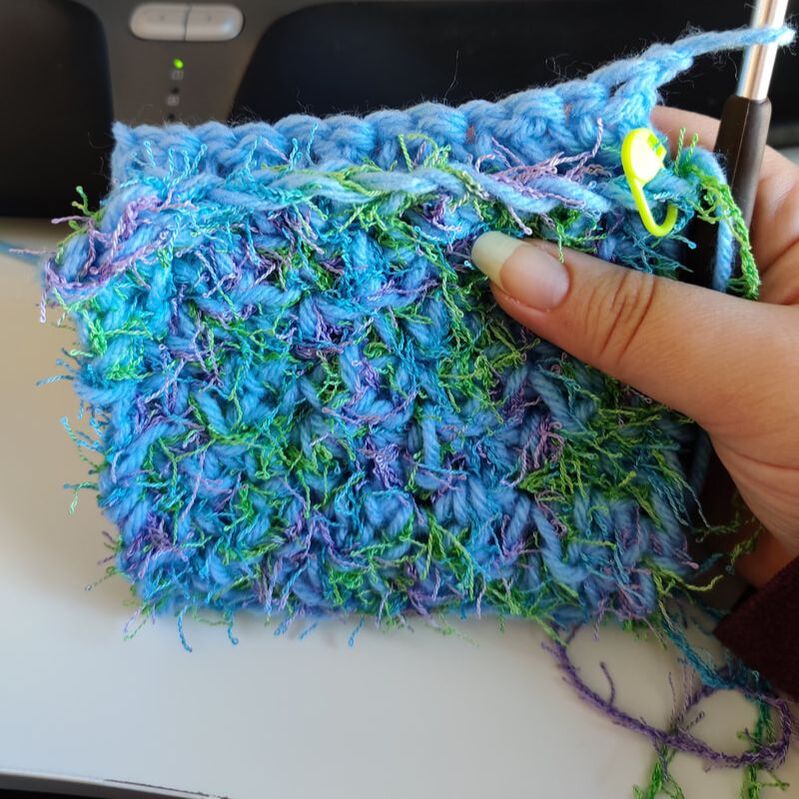
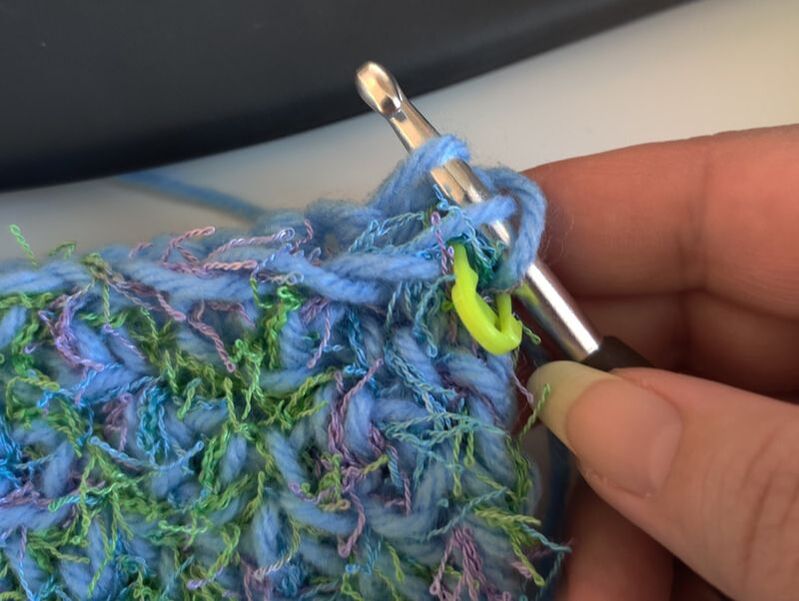
Fold the work in half. This row will join the foundation chain to the most recent row - effectively joining the two halves together at what is currently the top as you are holding the work. For this row you will Slip Stitch (SL ST) to join the Back Loop Only (BLO) of the scrubby double-yarn half with the Front Loop Only (FLO) of the soft single-yarn half (i.e., the "inside" loops of each side). On the scrubby double-yarn half, I also only stitched through the soft yarn and did not go through the scrubby yarn; this is not strictly required but might help keep a neater finish. Slip Stitch (SL ST) through the Back Loop Only (BLO) of the first Stitch (ST) of the scrubby half with the Front Loop Only (FLO) of the 1st and 2nd Stitches (STs) of the soft half. (This accommodates the increase made at the beginning of Row 8.) Slip Stitch (SL ST) through the Back Loop Only (BLO) of the next stitch of the scrubby half with the Front Loop Only (FLO) of the next stitch of the soft half. Repeat across the row for the next 8 stitches (i.e., all but the last stitch of the scrubby side). Slip Stitch (SL ST) through the Back Loop Only (BLO) of the last Stitch (ST) of the scrubby half with the Front Loop Only (FLO) of the last 2 Stitches (STs) of the soft half. (This accommodates the increase made at the end of Row 8.) If you made additional/different increases in Row 8, then you will need to adjust your decreases in this row accordingly. ALTERNATIVELY: If I were doing this again, instead of Slip Stitching (SL ST) in Row 18, I might try working Row 17 similar to Row 8, as Single Crochet (SC) stitches all the way across, working on the Front/Back Loops Only of each side of the work [working on the "inside" loops as the work is folded]. If you try this, go ahead and leave a comment with your feedback. Otherwise I'll try it next time I make a scrubby and will update this pattern accordingly :) Then I would skip Row 18 and move on to Row 19 [which in that case would be the real Row 18 of course]. - Edging/Trim: Note: The work is now sealed on two edges (the middle from Row 8 and the end from Row 18). To give a nice edge to the entire work, and to seal up the sides, work Single Crochet (SC) all around. Since we just stitched along Row 18, the edgework will begin from that row up the side toward the Row 8 fold. Chain (CH) 1. This provides room for the work to move around the corners of the piece. If using stitch markers, mark this stitch. Single Crochet (SC) up the side of the piece. Note: since the number of rows is different from the scrubby half compared to the soft half, the ends won't line up perfectly for stitching. It's okay, because the edging will cover things anyway - just try to keep even stitch spacing, and work the hook in where it feels appropriate/doable. At the end of the side, Chain (CH) 1 for the corner. Single Crochet (SC) along the middle fold, inserting a Single Crochet (SC) into each Stitch (ST). Chain (CH) 1 for the corner. Single Crochet (SC) down the other side of the piece, as with the first side. Chain (CH) 1 for the corner. Single Crochet (SC) along the final seam (Row 18), inserting a Single Crochet (SC) into each Stitch (ST). Slip Stitch (SL ST) into the Chain (CH) that started this step (where you placed the stitch marker, if you are using them.)
- Optional (Not Pictured) Hanging Loop:
If you want to add a loop for hanging this scrubber on a hook, now is the time to do so! I did not include this because I don't need it, so you won't see it in the photos. But what I would do is something like this: Chain (CH) 10, with fairly tight tension (not as loose as you would with a foundation chain). Slip Stitch (SL ST) into the last ST of the edging before the chain. Note: If you want to make a bigger or smaller loop based on your tastes and needs, just stitch more or fewer in your chain. If you want more sturdiness or decorative-ness to the basic chain-only loop: Single Crochet (SC) into the open space of the loop (rather than through each individual stitch). For a 10-chain loop, I would make about 20 Single Crochets (SC). As you work around the loop, scrunch the Single Crochets (SC) together so they are spaced nicely and give good volume. When you are satisfied with the entire loop, Slip Stitch (SL ST) into the first Single Crochet (SC) around the loop. Slip Stitch (SL ST) into the last ST of the edging before the chain for extra security in the connection. - Fasten Off & Weave In Ends Cut your yarn, put the cut piece through the loop on your hook, remove your hook, and pull tight. Weave in the ends with your needle. If you haven't already done the same with the scrubby yarn, you can do it now. Voila, now you have a lemon peel stitch double-sided scrubby dish cloth :)
TL/DR Pattern:
- Foundation: Work with both yarns until otherwise specified: Slip knot; CH 11; turn. - Rows 1-7: Lemon Peel stitch across: *SC in 2nd CH from hook, DC in next*, repeat between ** to end of row; CH 1; turn. On the last row, drop the scrubby yarn after the last DC, before the final CH and turn; work with only the soft yarn for the rest of the pattern. [Note: after 3 rows or so, double-check to see that the width is about what you want it; adjust the number of stitches as needed. After your 7 rows, double-check to see that the height is what you want it; adjust the number of rows as needed.] - Row 8: In FLO: 2 SC in the 2nd ST from hook; SC next 8 STs; 2 SC in the last ST; CH 1; turn. [Note: depending on your yarn combination, you may need more or less increases so that the width.] - Rows 9-17: Lemon Peel stitch across: *SC in 2nd CH fro hook, DC in next*, repeat between ** to end of row; CH 1; turn. - Row 18: Fold the work in half - it should naturally fold one way better than another (towards the side where you worked FLO). SL through soft yarn only of BLO of 1st ST of scrubby half and FLO of 1st & 2st ST of soft half. *SL through soft yarn only of BLO of next ST of scrubby half and FLO of next ST of soft half;* repeat between ** through next 8 ST on the scrubby side (all but the last ST on the scrubby side). SL ST through soft yarn only of BLO of last ST of scrubby half with FLO of last 2 ST of soft half. [Note: if you made different increases in Row 8, adjust the decreases in this row to accommodate.] - Row 17-18 (Alternative): If I were doing this again, I might try: work Row 17 as SC all the way across in FLO/BLO of each side of the work [working on the "inside" loops]; skip Row 18. - Edging/Trim: CH 1 for corner; mark stitch if desired. SC up the side of the piece [stitches will not line up perfectly since row counts are different for the scrubby side and soft side; just keep even spacing and place SC where appropriate/doable]. CH 1 for corner. SC along middle fold [Row 8]. CH 1 for corner. SC down the other side, as with the first side. CH 1 for corner. SC along the final seam [Row 18]. SL ST into the marked CH that started this step. - Optional (Not Pictured) Hanging Loop: CH 10 with tighter tension than a foundation chain. SL ST into the last ST of the edging (before the chain began). (Note: adjust size of chain if you want a bigger/smaller loop for your tastes/needs.) For more sturdiness/decoration: make 20 SC into the open space of the loop; SL ST into the 1st SC; SL ST into the last ST of the edging. - Fasten Off & Weave In Ends Voila, now you have a lemon peel stitch double-sided scrubby dish cloth :)
1 Comment
Leave a Reply. |
I don't have a separate website to corral all this kind of stuff, so here it is :) Crochet patterns, "Jenterior decorating," & other such stuff.
ArchivesCategories |
 RSS Feed
